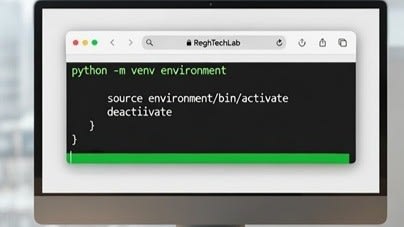
Mastering Python Virtual Environments with venv: A Beginner's Guide
As a developer passionate about clean, efficient coding practices, I've often found that managing Python projects can get messy without proper isolation.

August 15, 2026
As a developer passionate about clean, efficient coding practices, I've often found that managing Python projects can get messy without proper isolation. That's where virtual environments come in. Today, I'm sharing a simple, step-by-step guide to creating and using a virtual environment with Python's built-in venv module. Whether you're a beginner or need a refresher, this will help you keep your projects organized and conflict-free.
Why Use Virtual Environments?
Before diving into the how-to, let's quickly cover the why. Virtual environments allow you to:
Isolate project dependencies: Install packages specific to one project without affecting others.
Manage Python versions: Run different versions of Python for different projects.
Avoid system-wide changes: Keep your global Python installation (which I refer to as the base installation) pristine.
Simplify collaboration: Share exact dependency lists with teammates via requirements.txt.
In short, it's a best practice for any Python developer to prevent the dreaded "It works on my machine" syndrome!
Prerequisites
Python 3.3 or later installed (venv is included by default in Python 3.3+).
Access to a terminal or command prompt.
If you don't have Python installed, head over to python.org and download the latest version for your OS.
Step-by-Step Guide to Creating a Virtual Environment with venv
- Open your Terminal/Command Prompt and navigate to the directory where you want to create your project. For example:
cd path/to/your/project/folder
- Create the Virtual Environment. Run the following command to create a new virtual environment. Replace
myenvwith your preferred name:
python -m venv myenv
This creates a folder named myenv containing a fresh Python interpreter and pip.
- Activate the Virtual Environment
Activation scripts vary by OS:
On Windows:
myenv\Scripts\activate
On macOS/Linux:
source myenv/bin/activate
Once activated, your terminal prompt will change (e.g., (myenv) prefix), indicating you're in the isolated environment.
- Install Packages
Now, install any packages you need using pip. For example:
pip install pandas
This will only be available within this environment.
- Deactivate the Environment
When you're done, run:
deactivate
This returns you to your global Python setup.
THE END
We can do some extra stuff like
Managing Dependencies
To save your installed packages:
pip freeze > requirements.txt
Later, recreate the environment elsewhere with:
pip install -r requirements.txt
Common Pitfalls and Tips
If venv isn't available, please make sure Python is properly installed and try python3 -m venv on some systems.
For IDE integration (like VS Code), select the virtual environment interpreter in your settings for seamless debugging.
Delete a virtual environment by simply removing the folder (e.g., rm -rf myenv on Unix).
By incorporating virtual environments into your workflow, you'll save hours debugging dependency issues. I've used this in countless projects, from data science scripts to web apps, and it never fails to streamline things. What are your go-to tools for Python environment management? Do you prefer venv, virtualenv, or something like Poetry/Conda? Share in the comments below—I'd love to hear your thoughts! If this was helpful, like, share, or connect with me for more tech tips.
#Python #Development #CodingTips #VirtualEnvironments #TechTutorial
// Comments (0)
Log in or register to join the discussion.
// No comments yet. Start the conversation.